RT-Thread Software Package Development Guide
Note
CherryUSB has been added to the RT-Thread mainline and you can choose to use the mainline version with the same configuration method.
This section mainly introduces using the software package manager provided by RT-Thread to configure projects, demonstrated with env. The operations in this section are the same for different chips and won’t be repeated later. After opening env, use menuconfig to enter the package manager and select CherryUSB in the path shown in the figure.

Device Configuration
Select Enable USB device mode and press Enter to enter.
The first configuration is to configure USB speed, divided into FS, HS, indicating whether to use full-speed or high-speed functionality. High-speed functionality requires built-in high-speed PHY or external PHY
The second configuration is to select the USB device IP. If you are not sure which IP your chip uses, refer to the README in the corresponding port directory.
Select the class you want to use
Choose whether to use a demo template
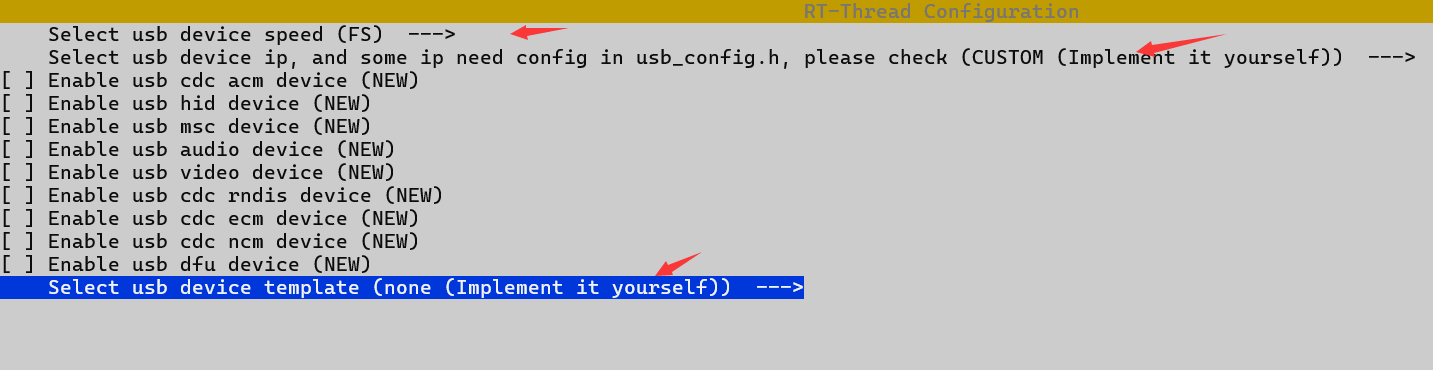
Finally exit and save.
Copy cherryusb_config_template.h file to your project directory, rename it to usb_config.h, add the corresponding header file path, and modify the following content:
#include "rtthread.h"

#define CONFIG_USB_PRINTF(...) rt_kprintf(__VA_ARGS__)
USB IP related config needs to be modified by the user according to the actual chip situation
Implement the usb_dc_low_level_init function in code
Call USBD_IRQHandler in the USB interrupt function and pass in busid
Call usbd_initialize and fill in busid and USB IP’s reg base. busid starts from 0 and cannot exceed CONFIG_USBDEV_MAX_BUS
Use scons –target=mdk5 or scons to compile. If using mdk, you need to use the AC6 compiler
If the chip has cache, refer to the cache Configuration Modification chapter for cache modifications
Host Configuration
Select Enable usb host mode and press Enter
Select USB host ip. If you’re not sure which ip your chip uses, refer to the readme under the corresponding port directory
Check class drivers as needed
Choose whether to enable template demo, recommended not to use
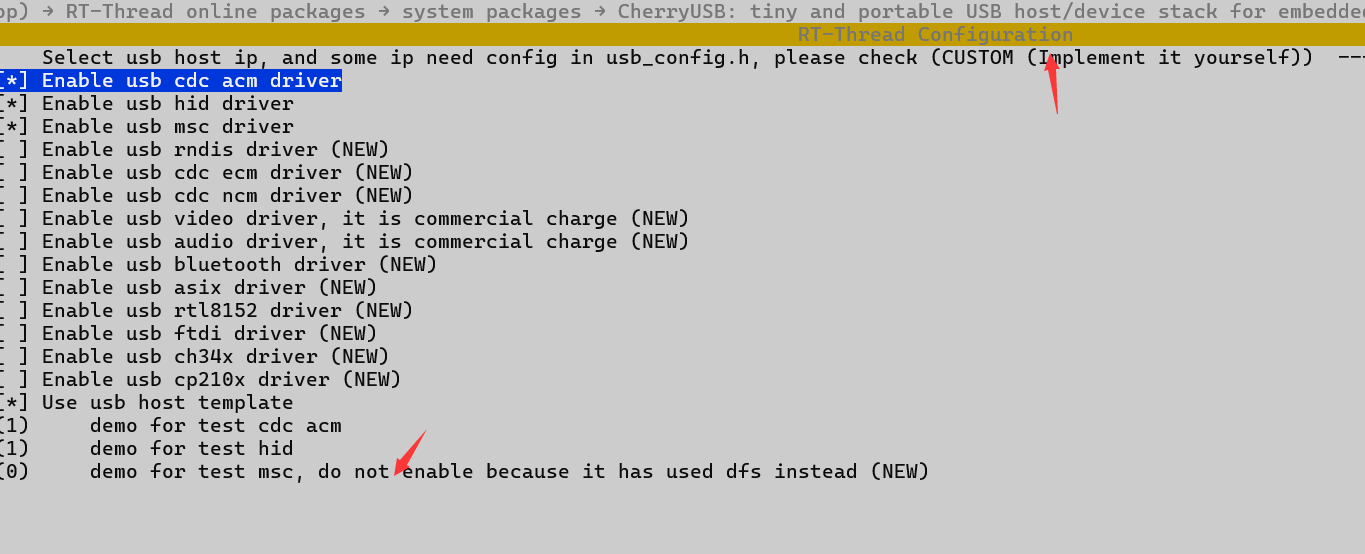
Finally exit and save.
Copy cherryusb_config_template.h file to your project directory, rename it to usb_config.h, add the corresponding header file path, and implement the following content:
#include "rtthread.h"

#define CONFIG_USB_PRINTF(...) rt_kprintf(__VA_ARGS__)
USB IP related config needs to be modified by the user according to the actual chip situation
Implement the usb_hc_low_level_init function in code
Call USBH_IRQHandler in the USB interrupt function and pass in busid
Call usbh_initialize and fill in busid and USB IP’s reg base and event_handler (can be omitted as NULL). busid starts from 0 and cannot exceed CONFIG_USBHOST_MAX_BUS
Use scons –target=mdk5 or scons to compile. If using mdk, you need to use the AC6 compiler
For linker script modifications, refer to the Host Linker Script Modifications chapter
If the chip has cache, refer to the cache Configuration Modification chapter for cache modifications